Posts

Showing posts with the label mint

Sunshine Spritzer

Image
Early summer is when our mint is at its best, and there’s a whole lot of it: Usually we don’t do all that much with it: throw it in a few salads, and ... well, that’s about it. Kirk wants to make mint ice cream, but we haven’t ever gotten around to that. He’s the only one who would eat it. Anyway, I was on the hunt for a refreshing drink with dinner the other night and was pleased to recall that, in addition to a garden full of mint, we had a bottle of homemade limoncello just chilling in the fridge: It was much fuller at the beginning of the week, and now I barely have any left, but that’s because I believe I’ve found its higher calling: a drink I’m calling Sunshine Spritzers. So light and refreshing, sweet but not too syrupy. It’s perfect  for July. This homemade limoncello was a gift from my friend Betsy, who was kind enough to share her not-so-secret recipe for this. It will last forever (ok, I can vouch for two years) in the fridge, and it’s a lot lik...

How to Drink Dandelion Wine, Part 2

Image
Last Saturday we hosted our Iron Bartender contest using dandelion wine as the required (and, I must say, challenging) ingredient. We had a total of eight original drinks, and when the voting was done, we ended up with a tie for third place, a tie for second place, and a clear champion. Today, we'll take a look at the second place cocktails. The Drink of the Lion Fairy Presented by Linda and Eric Getz 1 lemon's worth of juice and zest 1/2 bunch fresh parsley, rough chopped 6 springs of mint 5 1/2 ounces water 1&1/2 cup sugar 1 large spring of fresh mint 3 dots of aromatic bitters 1 oz. absinthe 1/2 oz. Bison Grass Vodka 1/2 oz. dandelion wine 1/3 oz. fresh squeezed lemon juice crushed ice 1. First, prepare an herbed simple syrup by combining lemon juice and zest, parsley, 6 sprigs of mint, water, and sugar in a saucepan. Heat on low until sugar is dissolved and syrup thickens slightly. Strain into a jar after syrup cools and comp...

A Day's Labor: Harvesting and Preserving

Image
Our garden is pretty big, and I try to keep the maintenance doable by working on one section each day of the week. That way everything gets done on a weekly basis, but in smaller pieces. Today I worked on the quadrant by the workshop and chicken coop. A typical day's work in one section of the garden includes weeding, thinning seedlings, deadheading, and harvesting. In addition to that, I had to pull out the spent row of pea plants and hill up the potatoes again, so this section took longer than usual. There was also a lot to harvest, including two rows of beets and a bunch of herbs that were starting to flower. Here's what the kitchen looked like when I was done: From left to right, there is Greek oregano, beets, a couple new potatoes, radishes, Italian oregano, curly parsley, and mint. There was also a spinner full of salad greens, but that went straight into the fridge. I also brought in two zucchini and a bowl of beans for supper, but they were from a different ...

The Herb Garden

Image
Did I mention that we had absolutely gorgeous weather last week during April vacation? One thing I love to do is to stroll around nurseries looking at all the plants they have, and it was a lovely week to do it. We don't need many flowers (although I still like to look), but I was on the hunt for the perennial herbs we have planned for the back row with the grapes . Although I was sad to find that my heretofore favorite nursery is shutting down, I found a great new (to me) nursery in Haverhill that might be my new first stop on future plant hunts. Cottage Gardens  is a great little family-run place on the Haverhill/Merrimac line, and you should definitely check it out if you live in the area. They had lots of flowers, a solid culinary herb selection, and their prices are great . I quickly filled up a flat of four-inch pots, including …  The basil and cilantro I mentioned before . These will give us something to munch on while we wait for the seeds to pop up and beco...

Moving and Removing Mint

Image
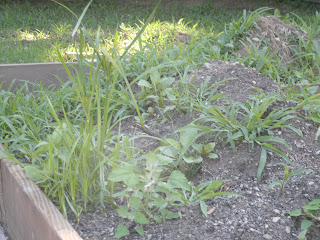
Last summer , one of the first things we planted in the newly completed garden was mint. It was a freebie salvaged from the back yard before the Bobcat came in, and I rather cavalierly just tossed the few small bits in the bed without much thought. In the past I had managed to kill mint that I planted, so I wasn't too worried about all that I heard about it being incredibly invasive. Well. Eight months after we planted it, that mint was everywhere . We were going to move it anyway, now that all the herbs are being moved to the back of the garden . Today when we went to dig some up to move it, this is what we ended up with: That is a five-gallon bucket stuffed to overflowing with mint roots--the big runners that reach everywhere and send up new shoots all over the place. And this is only the first of two buckets that we ended up with, all from a 4x8 foot bed.  I think we got just about all of it out as we turned the soil to amend it for the spring planting. We dec...

The Last Great Salad of 2011

Image
It is, at last, getting very cold. Last night I went out and picked what I'm pretty certain was one of the last salads of the year for us. Our greenhouse hoops with carrots, lettuce, and the cilantro is on its last legs: the cilantro has started to succumb to the cold, and there's not much lettuce left in there to pick. In preparation for some really cold (low 20s) nights this weekend, I picked a lot of unprotected greens, carrots, and herbs. Here's what I ended up with: The mixed greens included arugula, spinach, beet greens, mache, mesclun, and a bit of romaine I found growing back on a stem we had cut months ago. I also added some mint, cilantro, and chives that were hanging on through the cold.  The carrots, by the way, are true baby carrots. "Baby carrots" from the grocery store are usually actually regular carrots that are whittled down to standard sizes and shapes. (I don't even want to think about what happens to the wasted carrot shavings....

End of Summer Blossoms: Vegetable Edition

Image
When we planted the peas  seven weeks ago, we put in one trellis-length (12-ish feet) of regular peas and one trellis-length of snap peas. We figured this would let us snack on the snap peas while we waited for the regular peas to come in for harvests aimed at preparing or preserving for meals. Well, that didn't work. The regular peas blossomed about three weeks ago and are still going strong: These guys are about as tall as I am as they make their way up the trellis, and we've got a bunch of pods ready to go: The snap peas, though … oy. Hurricane rain and cooler temps have helped out everything else, and those stubborn bastards still didn't blossom. This weekend marks 7 weeks since we planted them, and... Finally! And look how gorgeous it is!  I wasn't expecting purple at all. Usually our pea blossoms are white, maybe tinged pink. But these were definitely worth the wait. I'm so excited about it, I'm posting an extra photo: We've got ...

Groceries From the Garden

Image
This weekend marks the first time in Newburyport that we've been able to take a stroll around the garden before making the grocery list to plan our dinners (or at least side dishes) around what is growing. Here's what we saw and what we decided to make with it. Radishes and Lettuce Our first radishes are ready to go. We didn't plant that many because in the past we've ended up with way more than we could ever eat, but a few are nice — especially since they come up so quickly. We use them as a row marker between two rows of carrots, and when the radishes are ready, the carrots are big enough to be thinned out. This row of mesclun is one of several rows of lettuce around the garden. This was planted later, but is ready to eat sooner than the lettuces in the background, because it's just a leaf lettuce. The ones in the back are our butterhead and redleaf, which take longer to mature because they are head lettuces. If you look really closely, you can see...

Fun With Mint

Image
The best part of growing food is eating it, so this week we are enjoying our first harvest  with recipes that call for mint. Here's what we came up with: Sunday: Zucchini Pancakes When we have lots of zucchini in the summer, we'll often have these as the main course. We got this zucchini at a local farm, though, along with sirloin that (previously) grazed in a pasture that's about 2 1/2 miles from our house. We were hungry from all that work! Kirk won't give me an exact recipe because he says it didn't turn out right--he thinks that salting the zucchini and squeezing out the water would help make it crispier. Everyone else thought it was fine. So in general, grate a zucchini, a carrot, and a small onion. Add some chopped mint (a little goes a long way), 1 egg, 1/4 c. flour. Stir it all up in a mixing bowl and add salt and pepper to taste. Fry it by dropping a spoonful of mixture into a pan of hot olive oil. It takes about 4–5 minutes, and they need to be ...

First Planting, First Harvest

Image
Preparing  From a gardening best-practices standpoint, we probably never should have gone on vacation two weeks ago. It was awesome, but you may recall that we came back to garden beds that looked like this: Well, they're even worse now—completely covered in crabgrass and other assorted weeds. If we had skipped vacation, we would have had the garden beds under control before this happened, but no. As it is, we have a completely irritating extra step as we prepare the planting beds. Step 1: Pull the weeds.  Last weekend we took the time to cover all the beds around the large patio area with the black plastic we had used in the side yard . This didn't work as brilliantly as it did on the lawn area, and I'm not sure why. Maybe it's because it wasn't as hot or sunny this week, or maybe crabgrass is just ridiculously well adapted to people trying to kill it. Some bits were dead, but most was just starting to yellow, which left us a lot to pull. We ended u...