Rendering Beeswax, Part 2
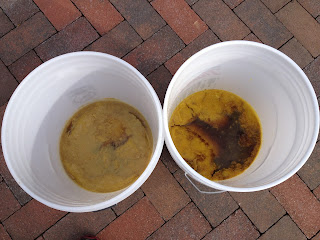
Remember last week when we did our first round of beeswax rendering? Here’s the result:
What we have here are two cakes of yellow beeswax floating atop brown, dirty water. The cakes aren’t nearly as thick as I imagined they would be, and all of the wax fit neatly into our beeswax sieve when we broke it out of the buckets:
The process for rendering the wax a second time is the same as the first. First, we melted it in boiling water for 20 minutes:
Once it was all melted, it definitely looked much cleaner the second time around. The waxy water was golden this time, not dirt brown:
This time, we added a few layers of cheesecloth to our sieve to filter it when we poured it into a bucket:
We also used a much smaller bucket. I was concerned that there wasn’t actually enough wax to make a thick cake in a wide, five-gallon bucket, so I grabbed an extra sap bucket instead. Here it’s cooling on the tile table on the porch, since the drawback of using a metal bucket is how hot it gets when you pour boiling water and wax into it:
Several hours later, we were able to cut our finished beeswax out of the bucket, where it was floating of yellow water:
It’s a really beautiful, deep yellow color. As you can see, the wax cake isn’t perfect, as there’s still a bit of sandy grit on the top. I should be able to scrape it off easily with a knife before using the wax, though, so it’s no big deal.
The wax disc is about a half-inch thick:
It also smells really, really good. It’s sweet like honey, and it should make really excellent candles — a future project, to be sure. I’ll also be able to use it in lip balms and lotions in the future. In the meantime, I think we’ll need to wrap this wax cake up and store it in an airtight box to keep mice away from it in the basement.


Comments
Post a Comment