Rendering Beeswax, Part 1
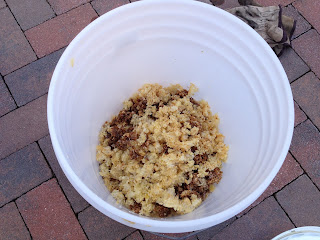
Though last fall’s honey harvest was complete by December, the bucket of crushed honeycomb left over from the process sat in the basement all winter — until today:
It’s still a sticky mess, but not even a little bit worse for wear after a few months (we had the lid on, after all).
Since we got through our (disappointingly small) bucket of sap fairly quickly today, we had space on the fire to deal with the beeswax. So Kirk ran over to Kelly’s to pick up a new stock pot and sieve — beeswax is pretty messy, so using something from the kitchen was out of the question.
To start, we rubbed some dish soap all over the outside of the pot to try to make it a little easier to clean off all the soot later (lesson learned from not doing that on the maple syrup pans, which will now blacken your hands instantly). Then we filled it up a third of the way with water and set it to boil:
Just as it does in the kitchen, keeping the lid on the pot helps it boil more quickly. The pan in the back is the last sap pan of the day’s maple sugaring.
Once it finally reached a boil, we dropped in chunks of crushed comb bit by bit:
The idea here is that the wax melts into the water and any impurities (bee larvae cocoons, for example) can float out of it. As you can see in the photo above, it’s not very pretty. It smells great, though.
Once you hit the two-thirds mark (so roughly half water and half beeswax), you let it all boil for 20 minutes so all the wax melts.
When it’s ready, you pour it through the sieve and into a big bucket, trying not to let any hot wax or sludge splash up on you:
All the sludge (apparently beekeepers call this “slum gum”) stays in the sieve, but you need to press it to work the rest of the waxy water through to the bucket:
That particular wooden spoon is now the official beeswax spoon.
The idea with this system is that as the boiling water cools, the beeswax all floats to the top, but gross stuff (and leftover honey) stays in the water below. You can already see it starting to work:
While we waited for it to cool, I made a little patty of the slum gum and set it aside to cool as well:
I have read that this is worth saving as a fire starter, since the papery bits will burn and the waxy residue that holds it together will make it act like fat wood to get a fire going. We’ll try it during next week’s sap boil and see if it’s actually useful or if it belongs in the compost pile.
The photo above is the wax a little bit later. As you can see, it’s still not ready, and apparently it takes several hours for it to cool completely. While we were waiting, we boiled a second bucket to finish off our full load of beeswax.
When it’s all done, we should have two solid discs of beeswax (one from each bucket) with dirty water trapped underneath. Since making nice, candle-worthy beeswax takes two renderings, we’ll do it all again next weekend and see how it turns out.


Not a bad idea to have a separate sieve and pot, but cleaning beeswax isn't too bad with a bit of scouring powder (at least for the pot). Not sure about all scouring powders, but Bon Ami works pretty well for me.
ReplyDelete